On this page
Guide · 12 min read
The complete guide to microcement
Everything to know before specifying microcement — the chemistry, the application sequence, the substrates it works over, the finishes you can get, the realistic UK 2026 costs, and the questions to ask any installer. Written to be the one place you can read before deciding.
What microcement actually is
Definition and origin
Microcement (also written micro-cement, microcimento, or, in French, béton ciré) is a thin, polymer-modified cement coating that bonds chemically to a substrate to form a continuous, seamless surface. Originally developed in southern Europe — Spain and France in particular — for industrial floors in the 1980s and 90s, it transitioned into high-end residential interiors in the early 2000s and is now mainstream across contemporary architecture and interior design. We install across London and Surrey; the same systems are specified worldwide.
Composition and application
The composition is simpler than the name suggests: high-strength Portland cement, fine quartz aggregate (typically 0–0.3 mm grain), an acrylic-resin binder dispersed through the mix, and pigments for colour. Mixed on-site with water in small batches, applied by hand in five to seven layers totalling just 2 to 3 mm in thickness, then sealed with a two-pack polyurethane top coat. The full system is a system in the engineering sense — every layer does a different job, and the overall performance depends on all of them being right.
What distinguishes it from the alternatives
Three things distinguish microcement from the alternatives. First, the surface is monolithic — there are no joints, no grout, no expansion gaps within the visible finish, regardless of how much area it covers. Second, it overlays existing finishes (tile, plaster, concrete, plywood, even old kitchen worktops) at 2–3 mm of total build, so most retrofit projects don't need rip-out. Third, the sealer is what determines the surface's behaviour — water-resistance, heat tolerance, UV stability, stain resistance — which means the same base material can be specified for a swimming pool, a kitchen worktop, or a hallway by changing the sealer chemistry.
| Property | Microcement | Paint | Wallpaper | Tile | Polished concrete |
|---|---|---|---|---|---|
| Visible joints / seams | None | None | At every seam | Grout lines around every tile | None |
| Waterproof surface | Yes (via sealer) | No | No | Tile yes, grout no | No |
| Overlays existing surface | Yes — tile, plaster, screed, ply | Yes | Sometimes | Rarely (tile-on-tile possible) | No (structural pour) |
| Works on walls, floors and worktops | All three | Walls only | Walls only | Walls + floors (large-format on worktops) | Floors only |
| Curves & integrated geometry | Follows curves and forms benches/niches | Yes | Difficult on curves | Tile cuts at every curve | Limited to flat slabs |
| Local repair | Re-troweled and re-sealed in place; usually invisible | Easy touch-up | Visible patch where new meets old | Replace tile (colour-batch matching often impossible) | Specialist grinding |
| Lifespan before first refresh | 10–15 yr (sealer refresh in place) | 3–5 yr (repaint) | 5–10 yr | 5–8 yr (grout/sealant fails first) | 15–25 yr |
| UK 2026 cost installed (£/m²) | 100–250 | 25–45 | 30–80 | 80–200 | 80–180 |
What microcement isn't
Microcement isn't a paint, it isn't a render, it isn't a self-levelling concrete, and it isn't a single product. The industry uses "microcement" as a generic term, but real microcement is always a multi-layer system. Anything sold as "one-coat microcement" or "microcement paint" is something else (typically a thin acrylic with mineral fillers) — they exist, they have their place, but they don't have the durability, waterproofing or longevity of the full system.
The full system, layer by layer
A proper microcement install is built up across seven distinct stages, with non-negotiable cure times between most of them. The shortest possible residential install is roughly seven working days; ten to fourteen is more typical.
-
Substrate prep
Clean, sound, structurally stable. Loose plaster consolidated, cracks filled with flexible repair compound, laitance ground off new screed, glossy paint or tile sanded for adhesion, surface vacuumed to dust-free, moisture content checked with a calibrated meter — typically below 3% by weight for cement-based screeds (BS 8204), and below 0.5% for anhydrite (calcium sulphate) screeds, which dry differently. This stage typically takes a half day to two full days depending on substrate condition. It's also the stage where the project either starts on solid ground or doesn't.
-
Primer
Substrate-specific. Different chemistry for absorbent (plaster, gypsum, screed, render) vs non-absorbent (ceramic tile, marble, terrazzo, glass-fibre) substrates. The primer creates the chemical bond between substrate and microcement; using the wrong primer is the leading cause of debonding. Applied with short-pile roller for flat areas, brush for cuts. Cure: 30 minutes to 2 hours depending on product, before mesh embedding.
-
Fibreglass mesh
60 g/m² alkali-resistant glass-fibre mesh for walls and standard floors, 100 g/m² for heated floors and high-movement substrates. Embedded in the wet primer layer with a 10 cm overlap at roll joints, smoothed flat with a mesh-rolling tool, with corner-reinforcement strips at internal corners. The mesh is what stops substrate movement cracking the visible finish; it's not optional, even though it's the most-skipped item in cheap quotes.
-
Two base coats
Applied with stiff steel trowel, 0.5–1 mm each. The base coats deliver the structural mass of the system and create the flat substrate that the finish coats sit on. Cure: 24 hours between coats. Light sanding between coats to remove imperfections and ensure adhesion of the next layer. The base layers are usually a slightly different colour from the finish coats — the finish colour is "built" by adding the precise pigment dose to the finish coats.
-
Two finish coats
Applied with flexible Venetian-style trowel, 0.3–0.5 mm each. The finish coats determine the final texture (smooth, stucco effect, or coarse effect) and the precise colour. The trowel pressure, angle and direction is what creates the cloud-like tonal variation of stucco-effect finishes; a uniform technique on the finish coats produces a uniform finish. Cure: 24 hours between coats. Light sanding between coats with 240–400 grit pads.
-
Two coats of sealer
Most premium residential microcement sealers are two-pack polyurethane, mixed on-site immediately before application. Some products are single-component PU dispersions or PU-acrylic hybrids — both are valid; 2K PU is the typical spec for wet zones and kitchens because it cures harder and resists chemical attack better. Microfibre rollers (4–8 mm pile) are the standard application method for hand-applied residential work, with cut-in brushes at edges; foam rollers and spray application are used in some industrial settings but give less control on a troweled microcement surface. Two coats minimum (three for pools and heavy commercial). Recoat after 4–24 hours within the manufacturer's window for chemical bonding between coats; if that window is missed, light sanding with 320–400 grit between coats restores mechanical adhesion. Through-cure to first usable hardness takes about 24 hours; full chemical cure takes 7–14 days for normal use, longer for water exposure.
-
Cure and handover
The cure window after the final sealer goes on staggers by what the room is going to be used for. Light foot traffic in socks: 24–48 hours. Normal residential use (furniture moved back in, daily life): 7 days minimum. Exposure to splashed water (kitchen worktops, bathroom floors): 14 days minimum. Standing water in showers: 21–28 days. Full immersion in pools and water features: 28–90 days depending on the sealer manufacturer's spec. The room is masked off in the first 48 hours where dust and footprints would mark the surface permanently; less aggressive protection from then on. The formal handover happens when the surface is signed off as cured to the level needed for the intended use.
Detailed kit-by-kit walkthrough of what's used at each stage is in the microcement toolkit guide; what each skipped step looks like later is in common issues; the heated-floor variation of the sequence is in underfloor heating compatibility.
Substrates it works over
One of the strongest practical arguments for microcement: it overlays existing surfaces almost universally, which makes it dramatically less disruptive than rip-out-and-replace renovation. The 2–3 mm system thickness means door clearances, threshold heights and skirting details usually stay where they were. The prep work and primer choice change per substrate type:
| Substrate | Prep work | Readiness check | Primer |
|---|---|---|---|
| Ceramic & porcelain tile | Deglaze (sand off the glaze), fill grouted joints flush with the tile face, hollow-tile test (replace any loose tiles). | Surface dust-free, joints flush, no loose tiles. | Non-absorbent-substrate primer. |
| Concrete & cement screed | Grind off laitance, fill cracks > 0.5 mm with flexible repair compound. | Fully cured: 4 weeks (50 mm liquid anhydrite), 6–8 weeks (traditional sand-and-cement), longer for thicker pours. Moisture < 3%. | Absorbent-screed primer. |
| Plaster & gypsum | Consolidate friable areas with penetrating primer; fill hairline cracks. | Fully cured: 4+ weeks for skim, longer for full plaster on solid masonry. Moisture < 3%. | Consolidating absorbent primer. |
| Plywood & MDF | 18 mm minimum substrate (22 mm for islands > 1.4 m), screwed down at close centres so it doesn't deflect. | Substrate rigid under load, no flex, joints sealed. | Wood-substrate primer. |
| Plasterboard | Stabilise any hairline joint cracks before applying. | Joints sound and not moving. | Bonding primer for non-absorbent surfaces. |
| Existing kitchen worktops | Confirm substrate is sound (no spongy laminate edges, no debonding from cabinet tops). Microcement adds 2–3 mm to height. | Substrate rigid, no flex, no separation from cabinet. | Matched to substrate type (laminate, solid surface, stone or tile). |
| Old painted walls | Cross-hatch adhesion test on existing paint; sand glossy/eggshell with 120-grit; remove any flaking areas back to sound substrate. | Paint passes cross-hatch test, no flaking. | Non-absorbent primer over sealed paint. |
| Existing concrete floors | Remove polish or sealer with floor grinder; repair any surface defects. | Open-pore surface, no contaminants, no laitance. | Absorbent-substrate primer (porosity-dependent). |
| Marble, terrazzo, granite | Hone off the polish so the primer can grip. Common in heritage retrofits. | Polish removed, surface dull and clean. | Non-absorbent-substrate primer. |
What microcement won't work over: anything moving (substrate cracks that re-open every season, plasterboard with loose joints, freshly extended walls that haven't fully settled), anything wet (moisture content above 3%, rising damp, penetrating damp, active leaks), or anything contaminated with a release agent that can't be ground off. In all those cases the substrate has to be fixed first, then microcement.
Three finishes, 47 colours
Every microcement install picks two things: a finish (which determines the surface texture) and a colour. The three standard finishes are determined by the trowel technique used on the finish coats and the final compression pass before sealing.

Near-uniform, minimal visible trowel marks. Best on walls, vanity tops, kitchen worktops and any vertical surface. Not for wet floors.
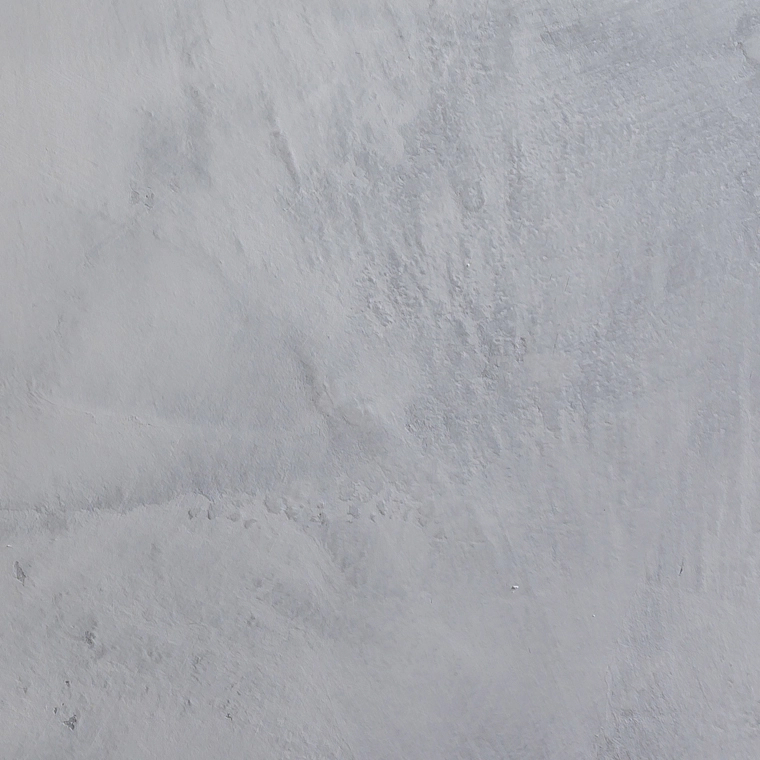
Cloud-like tonal variation, classic Venetian-plaster character. Most popular for residential bathrooms — slip-rated for floors, character for walls.

Pronounced grain you can feel underfoot. The right answer for shower floors and wet rooms where confidence underfoot matters.
The 47 standard colours from the main UK suppliers cover architectural greys (cool concrete tones through to warm putty), warm beiges and sand tones, earthy greens, cool blues, deep charcoals and inky blacks, plus a small palette of muted reds, pinks and oranges. The exact range varies by manufacturer, but most reputable suppliers offer 40–50 standard colours. Custom matching is available for design-led projects — Pantone, RAL, NCS, or matched to a specific reference (a sample of stone, a paint chip, a fabric swatch) — usually adding 10–20% to the materials cost and 1–2 weeks to the lead time.
A representative selection from across the palette. The full set of 47 standard colours plus custom-matched options lives on our colours & styles page; we also bring the full sample tray to every site visit so you can see them in your own light.
Mixing two finishes within the same project is common: smooth on the walls and stucco effect on the floor of the same bathroom, all in the same colour, the texture changing under hand or foot but the visual reading as one continuous space. Mixing two colours within the same finish (a darker tone in one zone of the room, a lighter tone in another, blended at the transition) is also possible but requires more skill and adds 15–25% to labour cost.
Where microcement is applied
The same base system adapts to almost every surface in a home or commercial space — what changes between, say, a shower wall and a kitchen worktop is the chemistry of the sealer and the subtle adjustment of the resin in the base coats, not the visible finish. Each application has its own application page with the technical specification:
- Walls — full-height seamless, including in bathrooms and showers. Use-case framing of which walls are worth specifying microcement on (and which to leave painted) is in where microcement walls earn their place.
- Floors — joint-free, compatible with underfloor heating. Floors are the most demanding application; the substrate prep is heavier, the sealer choice matters more, and the build-up has to handle daily wear.
- Bathrooms — fully waterproof through the sealer, no grout joints anywhere. The deep-dive on bathroom-specific spec, sealer choice and slip rating is in microcement bathrooms.
- Showers — walk-in, no enclosure needed, no transition between floor and wall. The slip-rated coarse-effect finish is the standard for shower floors.
- Kitchen worktops — heat-resistant grade behind hobs, integrated under-mount basins, formed waterfall edges on islands. The deep-dive on kitchen design language, splashback continuity, and where stone is still the answer is in microcement kitchen design.
- Swimming pools — full-immersion polyurethane sealer rated for chlorine and standing water, in any of the standard 47 colours plus custom matching. The same finish runs from the pool deck into the pool itself as a continuous waterproof gesture.
- Outdoor patios and walls — UV- and frost-resistant grade with aliphatic polyurethane sealer that stays colour-stable through UK weather cycles.
- Stairs and risers — slip-rated treads in stucco or coarse effect, smooth-finish risers, often run continuously with the floor at top and bottom for a single-material staircase.
- Furniture and built-in pieces — vanities, benches, fireplaces, fitted desks, integrated planters, even free-standing tables. Bespoke fabrication where the joinery is built first, then microcement-coated to match the surrounding surface.
Less common but possible: ceilings (especially in continuous wall-to-ceiling installs), curved geometry (microcement follows curves better than any other hard finish), bathtub plinths, integrated lighting troughs, fireplace surrounds (with heat-resistant grade for the immediate firebox area). If the architect drew it as a single continuous surface, microcement is what makes it actually read that way.
UK 2026 cost ranges
Per square metre installed, by application:
- Walls — £100–£180/m².
- Floors — £120–£200/m².
- Bathrooms (walls + floor + wet-zone sealer) — £140–£220/m².
- Worktops — £150–£250/m².
- Stairs — £180–£280/m².
- Pools — £180–£300/m².
- Outdoor — £130–£200/m².
- Furniture — £200–£350/m².
Typical project totals for common scopes: a feature wall £1,400–£2,500; a standard family bathroom £6,500–£12,000; a kitchen with worktops, splashbacks and feature wall £8,000–£14,000; a whole-house floor (120–150 m²) £18,000–£32,000. The full breakdown by room and what drives variation is in the microcement cost guide.
Two cost dynamics worth knowing. First, substrate condition is the biggest swing factor — a quote can land 30–50% apart depending purely on whether the substrate is ready or needs prep work. Second, lifetime cost over 15 years is competitive with quartz and lower than tile in wet zones, because microcement avoids the re-grouting and sealant-refresh cycles that tile bathrooms accumulate.
Living with microcement
Day-to-day care is the same as a sealed natural stone — soft mop, pH-neutral cleaner. No waxing, no special products, no abrasive pads, no bleach. The sealer is anti-scratch, anti-slip and stain-resistant in ordinary use; spills wipe clean within minutes if attended to in the moment, and within an hour or two even if left.
With normal residential use the surface holds for 10 to 15 years before the sealer benefits from a refresh, and that refresh is done in place — no demolition, no skips, no rip-out. Just a clean and a fresh top-coat applied over a couple of days, typically £600–£1,500 depending on area. The base layers underneath stay where they are for the full life of the install; only the top coat is renewed.
Localised damage can be repaired locally without affecting the rest of the surface. A deep scratch from a moved fixture, a chip from a dropped object, a stain that has bled through an aged sealer in one spot — re-troweled and re-sealed in the affected area in a half-day visit. Hand-applied finishes hide patches well; most local repairs are invisible after the sealer cures, particularly on stucco and coarse effect finishes.
Things that surprise people in the first year of living with it: cleaning is faster than expected (no grout to scrub, no caulk to maintain); the surface temperature feels neutral rather than cold (especially noticeable on bathroom floors); the colour stays consistent over time without fading or yellowing on a properly-spec'd sealer; and small marks from daily life — a glass dragged across a worktop, a wet shoe on a kitchen floor — don't accumulate into visible wear the way they do on paint or cheaper finishes.
Things to avoid: bleach and ammonia-based cleaners (these can affect the sealer over time), abrasive scouring pads, dragging sharp metal objects across the surface, leaving standing water in one spot for days at a time. None of these are unique to microcement — they're the same set of considerations as any sealed stone or quartz surface.